

DevOps Pipeline Automation with Google Cloud Build and Triggers

DevOps is a set of practices or stages that every application goes through before and after deployment which ensures continuous integration and deployment (CI/CD) of the application. The CI/CD pipeline automates the process for the deployment of code changes to the specified type of environment.
The Software Development Life Cycle (SDLC) in conjunction with the operations cycle makes the development and operations (known as DevOps).
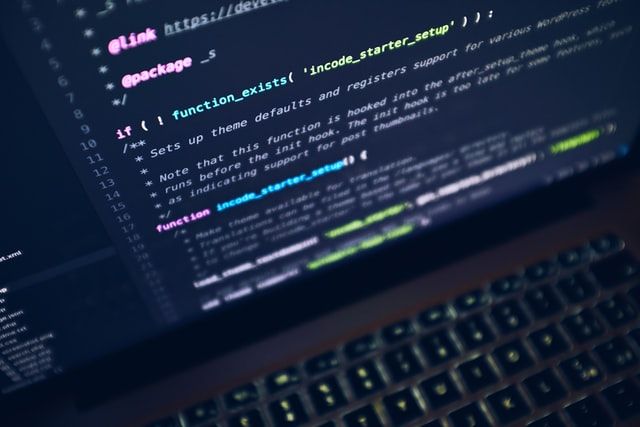
Docker packages applications as Docker images and stores them into containers with their configurations defined within the DockerFile.
Both the Google Cloud Platform's (GCP) Cloud Build and Container Registry are used to build and manage the built docker images.
Table of contents
- Pre-requisites
- Objectives
- Define the stages of DevOps pipelines
- Make a repository for the application
- Create a Python application
- Cloud Shell usages for testing
- Building the Docker images
- Using Container Registry to manage images
- Processing automation with triggers
- Build changes testing
- Conclusion
Prerequisites
To follow along with this tutorial with ease, one should have the following:
- Have a basic understanding of Git repository and programming languages like Python.
- Have installed Python.
- Have installed an IDE or code editor, preferably Visual Studio Code.
- A basic understanding of Docker.
- A basic understanding of Flask.
Objectives
In this tutorial, we will be learning how to automate DevOps pipelines using the GCP Cloud Build.
By reading this article, you will gain experience in:
- Defining the stages of DevOps pipelines.
- Making a repository for the application.
- Creating a Python application.
- Cloud Shell usages for testing.
- Building the Docker images.
- Using GCP Container Registry to manage images.
- Processing automation with triggers.
- Build changes testing.
Define the stages of DevOps pipelines
There are different stages involved in building pipelines from development to production.
The picture below describes all the pre-defined stages:

Let's understand more about each stage:
Plan
Without a proper plan, no one can successfully develop an application. An adequate plan must be put in place before embarking on the journey of development.
This is the stage where the justifications shall be given to technology stacks and other things required.
Code
Developers embark on the coding part after the requirements have been set in stage one. They will work on the application by collaborating through a single source of a repository.
Build
In this stage, the application developed shall be packaged and built into images using the choice of a package manager like Docker.
The application will also be shipped into containers with the configurations file required for its start-up.
Test
A series of tests will run through the application for better performance. Developers perform various types of application testing like unit testing, smoke testing, integration testing, and so on.
Other tests can be accomplished by the testers and quality assurance engineers. Selenium is the most popular continuous testing framework used in the industry.
Release
This is where the stage of continuous integration begins. This stage will be repeated countless times whenever there is any update in the application.
The popular tools used for this are Jenkins, GitHub Actions, Team City, and many more.
Deploy
An application that passed the continuous integration stage will proceed to the deployment stage. Staging will be the first thing before deployment using tools like Ansible, Puppet, or Chef.
Operate
The actual deployment starts in this stage using tools like terraform etc. The refined application will then be deployed and its operations will be monitored.
Monitor
The deployed application will be monitored in terms of performance. Logs will be generated while it is monitored.
All of these CI/CD stages can be done via the cloud.
In this tutorial, we will learn more about these pipelines by building a simple application. By building, you will understand the development and operation parts of the DevOps architecture.
Make a repository for the application
First, you will create a free trial account on the Google Cloud Platform console. This free account will run through the span of a year with a sum of the amount for billing purposes.
Click on this link to create a new account.
Having successfully created a new account, you will be redirected to the dashboard page as shown:

Before any resources can be consumed in the cloud, a project must be created.
You can create the project by clicking on the dropdown menu in the navigation bar. Then, tap on the New Project button inside the pop-up page.
Note that every project created is under an organization. A project has both name and an automatically generated unique ID.
Furthermore, we will make use of the cloud source repository provided.
The cloud source repository acts as a store for the development code. This service is very similar to that of platforms like Github, Gitlab, Bitbucket, and more.
Eventually, you will create a build trigger that starts a continuous integration pipeline when code is pushed to it.
To create a repository in the source, follow the steps below:
- In the cloud console menu, click
Source Repositories. - Click on the button
Add repository. - Select
Create a new repositoryand clickContinue. - Name the repository as
devops-repo. - Select your current project ID from the list.
- And, click
Create.
The image below shows the created repository. Refresh the page to verify the codes that were uploaded.

- Return to the cloud console dashboard, and click
Activate Cloud Shellin the top menu bar.
For the first time, you would have to set your project in the shell using the following command:
gcloud config set project
- If prompted, click
Continue. - Enter the following commands in the cloud shell to create a new folder
learning-devops, and clone the created repository created:
mkdir learning-devops
cd learning-devops
gcloud source repos clone devops-repo
Note: The cloned repository can be seen in the
Source Repositorysection, under the navigation menu.
Create a Python application
We will create a Flask application for demonstration. The application will be good enough to test the pipeline that you are going to build.
Below is the set of instructions for the application:
- In the cloud shell, click
Open Editorto open the code editor. - Select the
learning-devops > devops-repofolder in the explorer tree on the left. - Click
New Fileand name itmain.py.
Paste the following into the file you just created:
from flask import Flask, render_template, request

app = Flask(__name__)

@app.route("/")
def main():
    model = {"title": "Hello DevOps Fans."}
    return render_template('index.html', model=model)

if __name__ == "__main__":
    app.run(host='0.0.0.0', port=8080, debug=True, threaded=True)
- Save your changes.
- Right-click on the
devops-repofolder and add a new folder calledtemplates. - In that folder, add a new file called
layout.htmlwith the folling code:
<!doctype html>
<html lang="en">
<head>
    <title>{{model.title}}</title>
</head>
<body>
    <div class="container">
        {% block content %}{% endblock %}
        <footer></footer>
    </div>
</body>
</html>
- Also in the
templatesfolder, add another file namedindex.htmlwith the following code:
{% extends "layout.html" %}
{% block content %}
<div>
    <div>
        <h1>{{model.title}}</h1>
    </div>
</div>
{% endblock %}
Here, we created a simple Flask application that renders an index.html with a title "Hello DevOps Fans.".
- In Python, the application dependencies are managed using the
pippackage manager. - Now, you will add a file that lists the requirements for this application.
- In the
devops-repofolder, create a new filerequirements.txtwith the below content:
Flask==1.1.2
- In cloud shell, type the following code:
cd ~/learning-devops/devops-repo
git add --all
- Then, commit and push these changes to the repository, after entering your credentials:
git config -g user.email "your-mail-here"
git config -g user.name "Your Name Here"

git commit -a -m "Initial Commit"
git push origin master
On refreshing the repositories page, you must see the same files that we created locally.
Cloud shell usages for testing
The application can be tested using Cloud Shell by following the below steps:
- Back in Cloud Shell, make sure you are in your application's root folder, and then install the Flask framework using
pip:
cd ~/learning-devops/devops-repo
sudo pip3 install -r requirements.txt
- To run the program, type:
python3 main.py
Note: The server is configured to run on port
8080.
- To see the program running, click
Web Previewin the toolbar of Cloud Shell. Then, clickPreview on port 8080.
The program would be displayed in a new browser tab as shown:

- To stop the program, return to the Cloud Console and press
Ctrl+Cin Cloud Shell. - In the code editor, expand the
learning-devops/devops-repofolder in the explorer pane on the left, and open themain.pyfile. - Change the
titleto something else as shown below:
@app.route("/")
def main():
    model={"title": "Whatever you want."}
    return render_template('index.html', model=model)
- On the
Code Editortoolbar under theFilemenu, clickSaveto save your changes. - Navigate to the Cloud Shell and commit the changes to the repository as shown:
cd ~/gcp-course/devops-repo
git commit -a -m "committing another changes"
- Push your changes to the cloud using the following command:
git push origin master
- Return to the
Source Repositoriespage and refresh the repository to verify that your changes were uploaded.
Building the Docker images
The first step to using Docker is to create a file called DockerFile.
This file defines how a Docker container is made. It also describes and contains instructions for installing various dependencies required by the application.
The following are the set of commands required by our flask application inside the DockerFile:
- In the Cloud shell code editor, expand the
learning-devops/devops-repofolder. Click onNew Fileand the name itDockerFile. - Specify the Python image as below at the topmost of the file.
FROM python:3.7
WORKDIR /app
COPY . .
These lines copy the source code from the current folder into the /app folder.
RUN pip install gunicorn
RUN pip install -r requirements.txt
This uses the pip package manager to install the requirements of the Python application into the container.
Gunicorn is a Python web server that will be used to run the web app.
ENV PORT=80
CMD exec gunicorn --bind :$PORT --workers 1 --threads 8 main:app
The environment variable sets the port as 80. The last line runs the web app using the gunicorn web server.
- Ensure that the complete
DockerFilelooks as shown here:
FROM python:3.7
WORKDIR /app
COPY . .
RUN pip install gunicorn
RUN pip install -r requirements.txt
ENV PORT=80
CMD exec gunicorn --bind :$PORT --workers 1 --threads 8 main:app
Manage Docker images with Cloud Build and Container Registry
The Docker image would be created and stored in the registry. This image would then be wrapped up with the start-up commands in the container.
The Cloud Build is the infrastructure provided by the GCP for building Docker images. While the Container Registry stores the images built and can be accessed from there.
Note: The Docker image can also be stored in the Docker Hub.
- Return to Cloud Shell and navigate to the file below:
cd ~/learning-devops/devops-repo
- The Cloud Shell with environment variable
DEVSHELL_PROJECT_IDcontains the current project ID. The project ID is required to store images in Container Registry.
Enter the following command to view your project ID:
echo $DEVSHELL_PROJECT_ID
- Enter the following command to use
Cloud Buildto build your image:
gcloud builds submit --tag gcr.io/$DEVSHELL_PROJECT_ID/devops-image:v0.1 .
Notice the environment variable in the command. The image will be stored in Container Registry.
- If asked to enable
Cloud Buildin your project, typeYesand let it build successfully.
Note: If you receive the error
INVALID_ARGUMENT: unable to resolve sourcewait a few minutes and try again.
In Container Registry, the image name always begins with gcr.io/, followed by the project ID of the project you are working in, followed by the image name and the version.
The period at the end of the command represents the path to the Dockerfile: in this case, it shows the current directory.
- Return to the Cloud Console and on the Navigation menu, click
Container Registry. You must be able to see the built image on the list. - Now, navigate to the
Cloud Buildservice, and your build should be listed in the history. - You will now try running this image from a GCP Compute Engine virtual machine.
- Navigate to the
Compute Engineservice. - Click
Create Instanceto create a new virtual machine. - On the
Create an instancepage, specify the following, and leave the remaining settings as their defaults:
Property  - Value
Container - Deploy a container image to this VM instance
Container image - gcr.io/<your-project-id-here>/devops-image:v0.1 (change the project ID where indicated)
Firewall  - Allow HTTP traffic
- Click
Create. - Once the VM starts, create a browser tab and request this new VM's external IP address. The program should work as before.
- You will now save your changes to your Git repository.
In Cloud Shell, stage all the local changes, commit them, and push them to the repository as shown:
cd ~/learning-devops/devops-repo
git add --all
git commit -am "Added Docker Support"
git push origin master
Automate builds with Triggers
Here, we will make some changes to the application and then automate the build using the triggers. This helps to update application versions.
- On the menu, navigate to
Container Registry. At this point, you should have a folder nameddevops-imagewith at least one container in it. - On the
Navigationmenu, clickCloud Build. The builds history page should open up with at least one or more builds in the history. - Click the
Triggerslink on the left and then click on theCreate triggerbutton. - Name the trigger
devops-trigger. - Select your
devops-repoGit repository. - Select
.*(any branch)for the branch. - Choose
Dockerfilefor Build Configuration and select the default image.
Note: The image below describes the way your build configurations will be.

- Accept the rest of the defaults, and click
Create. - To test the trigger, click
Runand thenRun trigger. - Click the
Historylink and you should see a build running. - Wait for the build to finish, and then click the link to it to see its details.
- Scroll down and look at the logs. The output of the build here is what you would have seen if you were running it on your machine.
- In the
Container Registry, you should see a new folderdevops-repowith the new image. - Return to the Cloud Shell code editor. Find the file
main.pyin thelearning-devops/devops-repofolder. - In the
main()function, change thetitleproperty toThis is from build trigger.as shown below:
@app.route("/")
def main():
    model={"title": "This is from build trigger."}
    return render_template('index.html', model=model)
- Stage, commit, and push the changes:
cd ~/learning-devops/devops-repo
git add .
git commit -a -m "build trigger test"
git push origin master
- Return to the Cloud Console and the
Cloud Buildservice. You should see another build running.
Build changes testing
- When the build completes, click on it to see its details.
- Under execution details, copy the image link. The format should look something like
gcr.io/<your-project-id>/devops-repoxx34345xx. - Go to the
Compute Engineservice. As you did earlier, create a new virtual machine to test this image. - Click on the box to deploy a container image to the virtual machine, and paste the copied image.
- Select
Allow HTTP traffic. - When the new machine is created, you can test your changes by requesting the virtual machine's external IP address in your browser. Your new message would be displayed.
Note: You might have to wait for a few minutes after the VM is created for the Docker container to start.
Conclusion
In this tutorial, you built a continuous integration pipeline using the Google Cloud services like Cloud Source Repositories, Cloud Build, Build Triggers, and Container Registry.
You learned how the automation of pipelines works using the build triggers when there is an update in the code repository. You also learned about the basics commands with git and how to spin up the Flask server from the ground up.
You can find the full code here.
Happy coding!
Peer Review Contributions by: Srishilesh P S


Cloudzilla is FREE for React and Node.js projects


